Phone Won't Charge? Try This Easy DIY Trick First

You plug your iPhone or Android phone into its charger and… nothing happens. Big sigh. From broken or rusted charging ports to damaged power cables, there are plenty of reasons your phone might not charge and not all of them can be easily fixed at home. A common reason for faulty charging is simply that your charging port, whether that’s Lightning on the iPhone 14 Pro or USB-C on the more recent iPhone 15 Pro or Android phones like the Google Pixel 8 Pro or Samsung Galaxy S24 Ultra, is clogged with months’ worth of pocket fluff and the cable can’t quite fit in anymore.
Not to worry: This is one of the simplest and cheapest charging problems to fix. Here’s how.
Why is my charging port blocked?
There are no covers on your phone’s charging port, meaning they’re exposed to every bit of dust, dirt and debris they encounter. Every time you slide your phone into your pocket your phone will be susceptible to pocket fluff and if, like me, you’ve got pockets filled with detritus from accidentally washing your jeans with old receipts in the pockets then that’s asking for trouble. And that’s to say nothing of the biscuit crumbs I have in there. Do not ask me why I have biscuit crumbs in my pockets.
Day by day, this won’t be a problem but those tiny bits of dust and fluff will build up over the months or years you have your phone, compacting together each time you plug in your charging cable until it forms a solid barrier that stops your charger from going all the way in and allowing it to connect and charge.
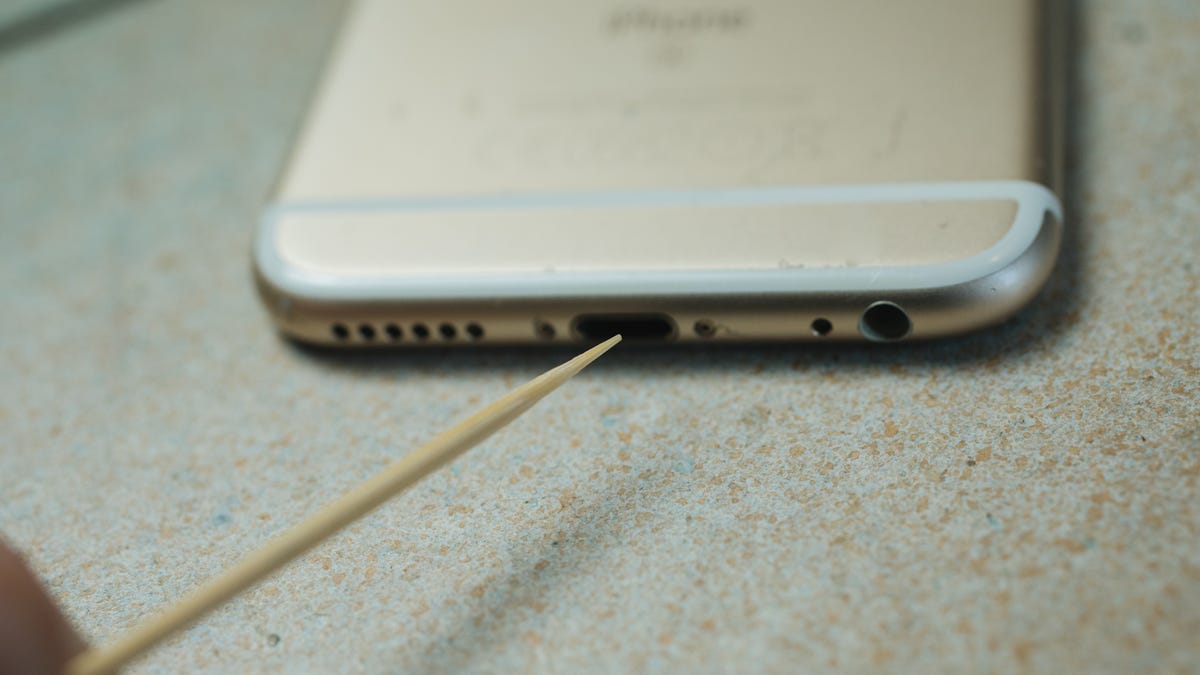
A wooden cocktail stick is a great tool for the job as the wood won’t damage the internal parts.
If you’ve had your phone for more than six months and you’re gradually finding the charger becoming less and less stable (particularly if you have to wiggle it around to get it to begin charging) then it’s highly likely that dirt in your port is the culprit.
How to clean out your phone’s charging port
It’s a simple task to unclog your phone’s port. You’ll need a cocktail stick, toothpick or other thin item that you can poke in to the port to scrape out the grime. Wood or plastic is better as it’s less likely to scrape against anything inside and potentially cause harm. I’ve done this using a metal SIM removal tool and while it worked well, it’s not the safest option for your phone.
Insert your tool of choice into the charging port until it won’t go further and gently start scraping away. With an older iPhone’s Lightning port you can scrape back and forth, but with USB-C you’ll need to scrape around the charging connector, which sits in the middle of the port.
Get it in there.
Eventually you’ll start to work the compacted debris loose and you’ll be able to encourage the dislodged material out of the port. It’s a satisfying process and you might be surprised at how much stuff actually comes out. Gently work on the sides of the port too, but be mindful not to scrape hard against any of the metal charging connectors.
Eventually you’ll have pretty much all of it out. It’s difficult to check for sure if you’ve gotten rid of it all as it’s tricky to see inside the port, even if you have a good light to hand. But once you’ve got a good amount of nonsense out, you can try your charging cable again.
The satisfying removal of nonsense from your phone’s charging port.
Hopefully it’ll plug in more securely now and begin charging. If not, carry on trying to extract more dirt and then test the charger again. If that still doesn’t solve the issue it’s time to consider other solutions like a new cable or charger.
Source: CNET


