A Thermal Imaging Camera Like the InfiRay P2 Pro Can Save You Money: Here’s How

I always thought that owning a thermal camera was something only specialized professionals did. Admittedly, I am a specialized professional — I review devices that need precise heat to work — but I wanted to know how you, the consumer, might use one, too. Turns out, the InfiRay P2 Pro is already helping me save money around my home.
One of the most expensive parts of owning a home is heating and cooling. According to Direct Energy as much as 47% of your electric bill is heating and cooling, and those costs are inflated when your home is improperly insulated. While most modern homes come with insulation in the walls and ceilings, older homes and newer ones that weren’t built as well can have huge gaps where heat can come in or escape depending on the season. Insulation can also settle or shift over time, making it less effective.
My home was built in 2002, so it’s relatively new, and living in Virginia means I get both boiling hot summers and freezing winters. I need my insulation to work well, but it just doesn’t. My bedroom, in particular, is too hot in the summer and too cool in the winter and I wasn’t sure why. Enter the P2Pro thermal camera from InfiRay.
Note: While InfiRay sent me the P2 Pro with the macro lens for review, I don’t think the lens actually helps when it comes to you and your home. The macro lens is for those specialized job people I mentioned earlier. I think the P2 Pro without the lens is a better buy for the average consumer
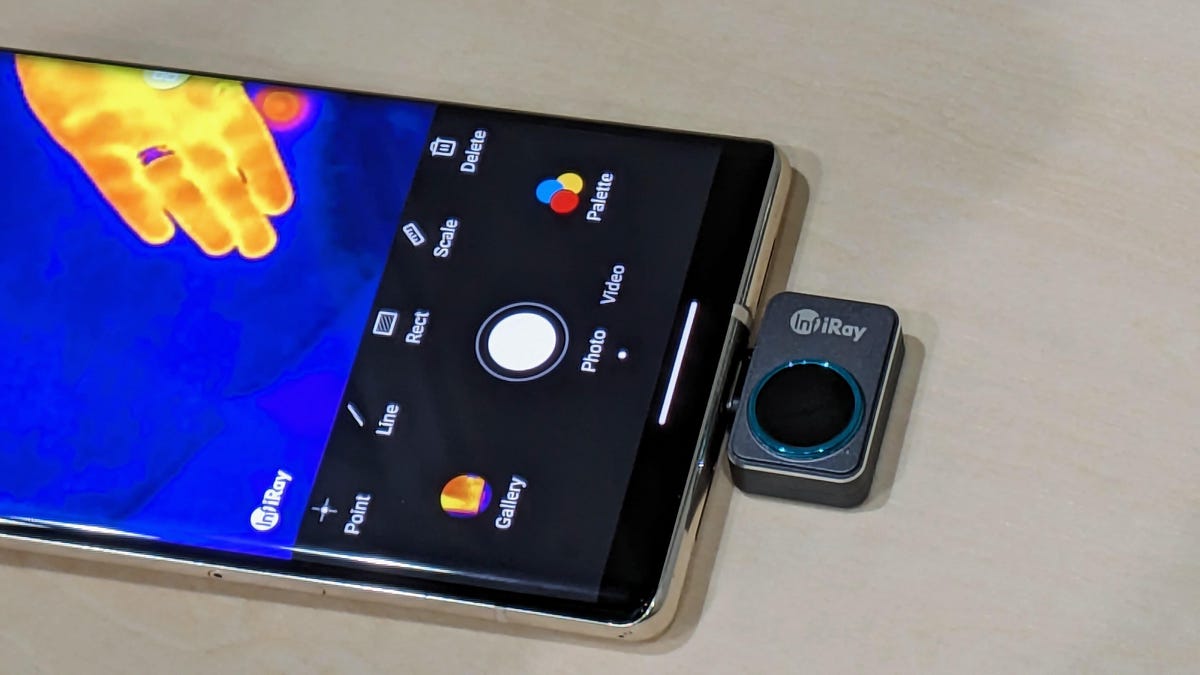
Using the P2 Pro is simple. First, make sure you buy the right camera for your phone. Mine is the Pixel Fold, so InfiRay sent me the Android version, but there is an iPhone version too with a lightning plug instead of a USB-C if you are so inclined. Then all you have to do is download the app, and when you plug in the camera it launches into the software. The camera works whichever way you put it in so remember to face it out so you can see the screen while you use it.
The interface for the app is as simple as pointing the camera where you want to image and then tapping the screen where you want a temperature point to appear. There are several other ways to measure the heat — hottest and coldest temperature along a line is a good one — but I find the single point one to be the most effective.
Once you have the information you need on screen, you can take a photo or video that will save to your camera roll. I especially like the picture-in-picture mode as it gives you a good reference of what you are looking at as thermal images are sometimes — always — hard to decipher.
How can a thermal camera help save you money?
Now that I had the P2 Pro and I knew how to use it, I started thinking about how it could help me save money around the house. Knowing that a lack of insulation is often a reason for high heating and cooling bills, I started a sweep of my home looking for anomalies. Straight away, I found all of my exterior doors had areas where the heat was getting in. Windows, of course, but also in the gaps where the doors don’t fit quite right. A few strips of draft excluder from Home Depot fixed that particular problem.
The biggest issue came from the garage. My garage is under my bedroom and, because it wasn’t insulated, seemingly at all, the temperature there regularly reaches 95 degrees or more. This in turn heats my bedroom where my thermostat is located, making my A/C turn on, even when the rest of the upstairs is at a reasonable temperature.
The expensive solution here is going to be to pull out the drywall on the ceiling, fill the cavity with some good insulation and re-drywall the space. My interim solution is to buy some foil face insulation and staple it to the existing drywall until I can afford the expensive option. Thankfully, this is the garage and I’m the only one who spends any time there, so it doesn’t matter if it isn’t pretty.
Insulating your house correctly is a quick and easy way to save a lot of money, but a thermal imaging camera can also help you prevent major issues before they get out of hand. Using the InfiRay P2 Pro you can see water intrusions that can come from leaking pipes as hot or cool spots in your walls or under your slab. I’ve taken to doing regular inspections of the walls to ensure everything is in order. I had a slab leak in my last home that we didn’t spot for weeks. We had to completely gut our kitchen. I’m not eager to repeat that problem.
According to Home Advisor, the average cost of a thermal inspection is around $350. That’s $50 more than the basic InfiRay P2 Pro and it’s just one inspection. By purchasing your own thermal camera, you have the means to check your house regularly for leaks and spend some time making it better insulated, saving you even more money. I wasn’t sure if buying a thermal camera was worth your time (or money) until I used one for myself. Now I’m convinced.
More energy-saving advice
Source: CNET


