Ditch Your Password: Set Up a Passkey for Your Google Account

Tired of being forced to both remember and type in passwords to log in somewhere? Try a passkey: the FIDO Alliance-developed authentication method that was quickly adopted by the likes of Apple, Google and Microsoft. Though they aren’t quite the standard across the industry just yet, passkeys are slowly becoming the “solution” to passwords, giving you more security and peace of mind and taking away the frustration of passwords when it comes to protecting your online accounts.
At the forefront of the passkey push is Google, which offers easy ways to set up and sync your passkeys across devices through the Chrome browser. If you’re new to passkeys and want to get started, one of the best places to begin is creating one for your Google account — because you obviously have one of those.
Below, we’ll show you how to set up a passkey for your Google account and get a glimpse of the passwordless future tech giants are promising us. For more, don’t miss what you need to know about your iPhone’s new RCS support and this nifty hack to free up space in your Gmail account without deleting all of your emails.

If you want to use a hardware security key to enter your passkey and sign in to your Google accounts, Google has its own Titan Security Key. The key works with your computer, but can also connect to most iPhone and Android devices, as long as they support USB or NFC.
Details
What are the requirements to use Passkeys?
Before you set up your Google passkeys, you must meet the following requirements, which vary depending on what device you’re using.
- For mobile devices, you must be running at least iOS 16 or Android 9.
- For your computer, you must be running at least MacOS Ventura or Windows 10. Also, your web browser must be at least Google’s Chrome 109, Apple’s Safari 16 or Microsoft’s Edge 109.
How to set up passkeys with Google
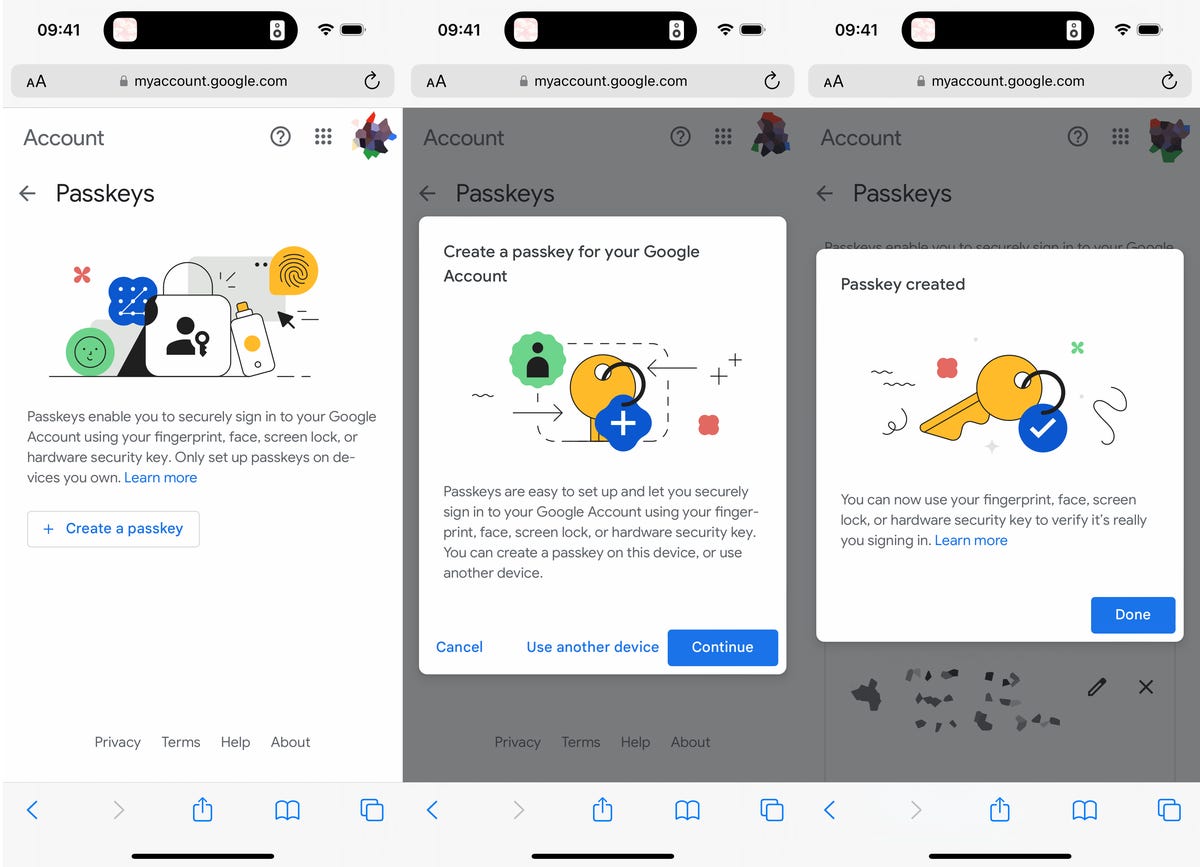
In the web browser of your choice — on your phone, tablet or computer — head over to g.co/passkeys. If you’re already logged in to your current Google account, you’ll be asked to enter your normal password to verify your identity. If you need to switch accounts, tap the current email to choose from all your other Google accounts.
Now enter your password when prompted, and hit Next. On the following page, you’ll be asked to create a passkey. When the pop-up appears, hit Continue. The passkey will be saved to your device (for example, iCloud Keychain on iOS), which varies depending on your device.
You’ll need to follow any prompts and use whatever biometric your device asks to confirm your identity. Once you do, your passkey will be created for that device.

You can use your face, fingerprint, screen lock or hardware security key to log in to Google once your passkey is set up.
Note: There is an option to create a passkey using another device (tablet, external security key), but the easiest method is to just create the passkey on the device you’re using.
You can now use your passkey to log in to your Google account. If you have two-factor authentication enabled, your passkey bypasses 2FA because a passkey means you have physical possession of your phone, which is what 2FA essentially does. Also, if you don’t want to use your passkey for any reason, you can always use your password to log in.
Lost your device that had a passkey on it? Google’s got you
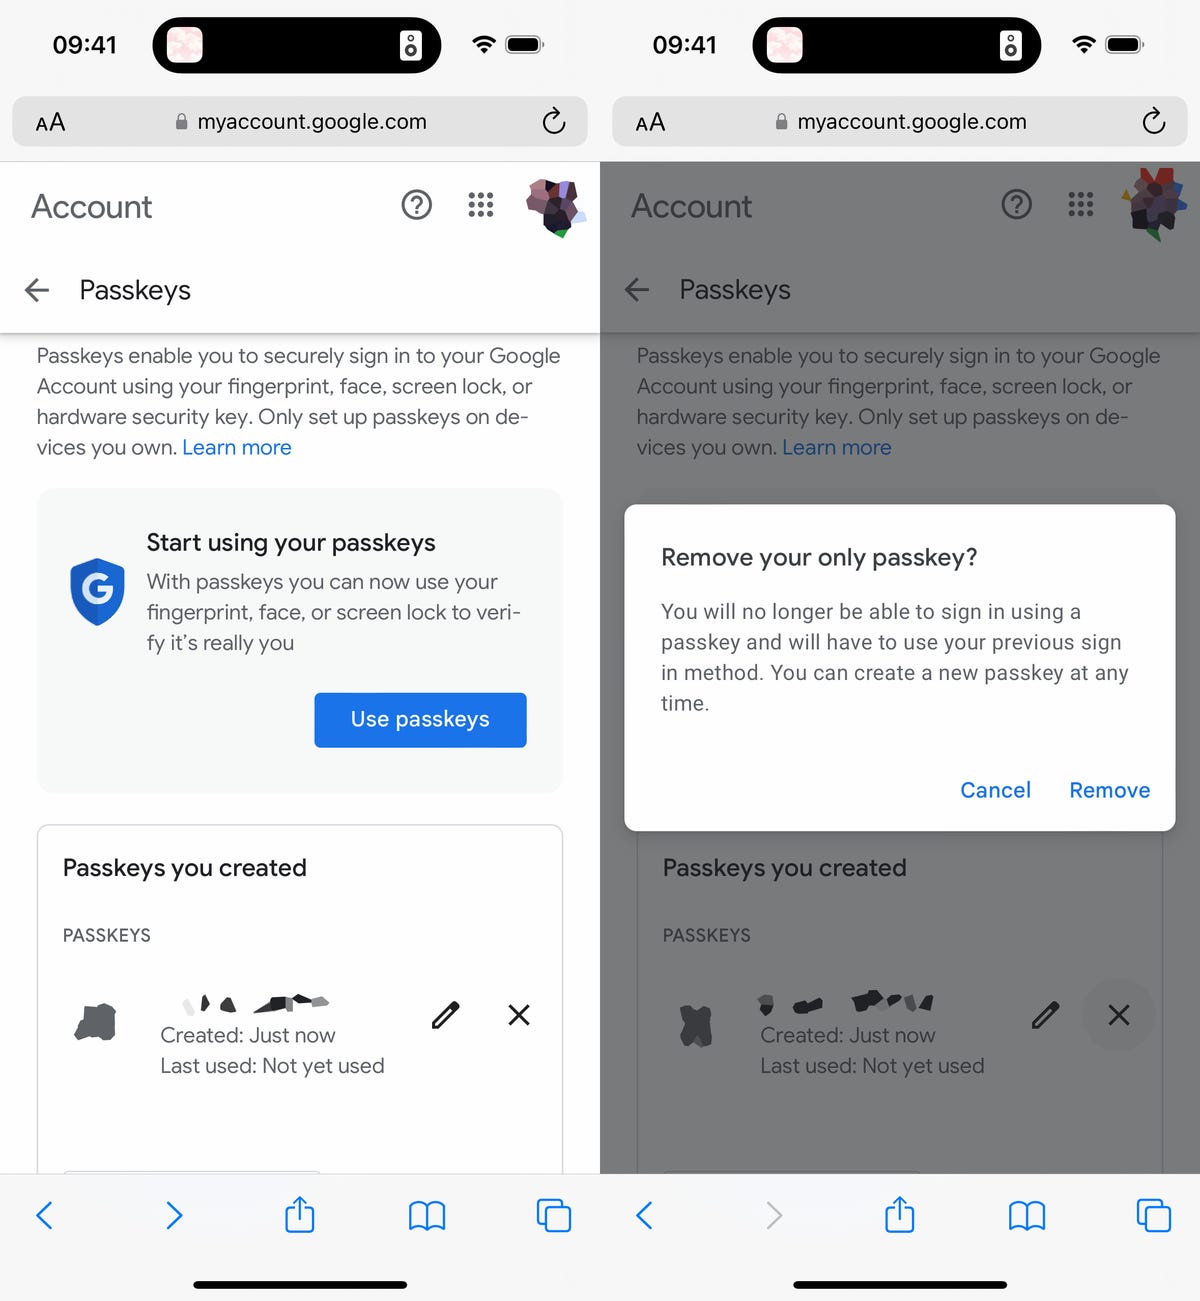
If for any reason you lose your device or have it stolen, you can still log in to your Google account. Using another device that has access to your Google account: Go to g.co/passkeys, sign in to your account using your usual password and remove the passkey associated with your lost or stolen device. Just hit the X next to the passkey and then hit Remove to get rid of it and go back to using your password.
For more, check out how to boost your iPhone’s security on iOS 18 and 7 settings to change as soon as you get your new iPhone 16.

Even if you don’t lose your device, you can still remove your passkey and go back to your usual password.
Source: CNET


